

DIY builds
DIY Sauna: How to Build Your Own Home Sauna, Step by Step
How to build a sauna yourself, in the order it happens: framing, insulation, foil vapor barrier, air gap, wood, vents, benches, heater, door and finish, with a real 6 by 6 parts list and what it costs.
The short answerA DIY sauna is a framed, insulated room lined, in order, with a foil vapor barrier, an air gap and wood boards, then fitted with benches, vents, a door, lights and a heater sized to the room. The sauna materials for a 6 by 6-foot indoor room from our catalog come to about $11,190. On top of that you pay for framing lumber, insulation, a licensed electrician and delivery.
A quick word before you start. We supply the materials. The design, the build, the permits and the wiring stay yours, with your own contractor and a licensed electrician. Call or email us about any product on the site and we will tell you what it is compatible with and what it needs alongside it.
This guide walks through the build in the order it happens, using the instructions Harvia and HUUM publish for their heaters and rooms. For every measurement in more depth, with drawings, see our Sauna Build Guides. If you would rather pick every part on screen and see the room drawn to scale, use the Sauna Builder.
What a sauna wall is made of
Every sauna wall and ceiling is the same five layers, from the outside in:
| Layer | What it does |
|---|---|
| 1. Framing | Ordinary stud walls and ceiling joists, like any room |
| 2. Insulation | Keeps the heat in so the heater can reach temperature |
| 3. Foil vapor barrier | Stops steam from soaking into the insulation and framing |
| 4. Battens (air gap) | Thin strips that hold the wood off the foil so the wall can breathe and dry |
| 5. Tongue-and-groove boards | The wood you see, lean on and smell |
The battens and boards add roughly 1¼ to 1½ inches to each wall, so plan your framing a few inches larger than the room you want inside.
Step 1: Pick the size and the spot
Most home saunas are 5 to 7 feet on a side with a 7-foot ceiling. A low ceiling keeps the heat where you sit. All of the complete Hotass cedar wood packages we sell are cut for a 7-foot ceiling, in ten footprints from 5x6 to 6x8 feet.
Choose a spot you can reach with a 240V circuit, check whether your town needs a permit, and leave room for the door to swing outward.
Step 2: Frame it and plan the wiring
Frame the walls and ceiling the way you would for any small room. Before anything gets covered, bring in your electrician to run the heater circuit, the light and, if your heater has a separate control, the control cable. The heater's own installation manual specifies the wire and the breaker, and the final hookup is a licensed electrician's job.
Step 3: Insulate
Harvia calls for about 4 inches (100 mm) of insulation in the walls and ceiling. Use unfaced mineral wool or fiberglass batts. Avoid kraft-faced batts, because the paper facing is combustible.
Skip ordinary foam board unless your inspector approves it. Common extruded foam is only rated to about 165°F, below the temperature at a sauna ceiling, and the International Residential Code requires foam plastic to be covered by a ½-inch gypsum thermal barrier, which wood boards are not.
Step 4: Hang the foil vapor barrier
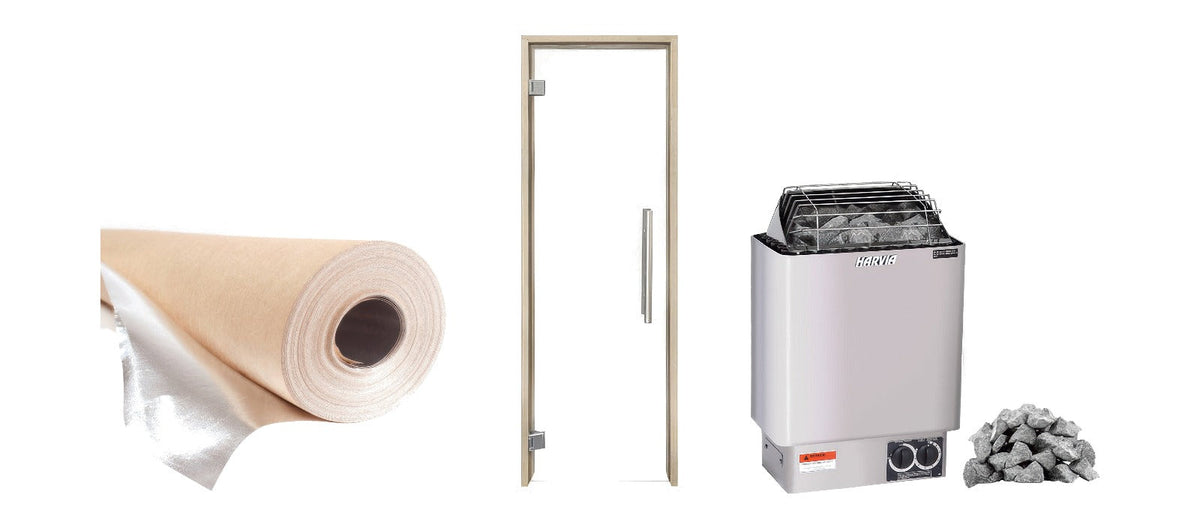
Staple foil over the insulation on the room side so it covers every wall and the ceiling. HUUM's build guide is clear that every seam and every hole must be sealed with foil tape to make one continuous vapor-tight layer. The Hotass wood packages include a vapor barrier roll; foil tape is sold separately.
Step 5: Add battens for the air gap
Fasten thin battens over the foil to leave an air gap of at least 0.8 inch (20 mm) between the foil and the wood, which HUUM says lets the structure dry. Run the battens the opposite way to your boards: horizontal battens for vertical boards, and the reverse.
Step 6: Put up the boards
Nail the tongue-and-groove boards to the battens across the ceiling and walls, cutting openings for the vents and heater wiring as you go. If you are buying boards by the piece instead of a package, our wall boards run from $32.05 for an 8-foot length in alder or hemlock to $72.69 in cedar.
Step 7: Cut in the vents
For a home sauna with an electric heater, Harvia's ventilation guidance is:
- Fresh air in: below or beside the heater, through a 2 to 4-inch (50 to 100 mm) opening.
- Air out: near the floor, as far from the heater as you can get, about twice the size of the inlet.
- Drying vent (optional): high on the wall, kept closed while the sauna heats and while you bathe, and opened afterwards. Leaving the door open after a session does the same job.
Harvia's target is six full air changes an hour. Our wooden vent covers start at $71.40.
Step 8: Build the benches
Set the upper bench by the ceiling, not the floor. Harvia recommends 1,100 to 1,200 mm (about 43 to 47 inches) between the upper bench and the ceiling, at least 500 mm (20 inches) of depth to sit and 600 mm (24 inches) or more to lie down, and about 350 mm (14 inches) of rise between levels. Use knot-free, low-resin wood where skin touches it. The Hotass packages include two-tier floating benches and a backrest.
Step 9: Choose and install the heater
Size the heater to the room. Harvia's rule is about 1 kW per cubic meter (35 cubic feet) of room, with extra for glass, stone or other uninsulated surfaces, because they soak up heat. Our free Heater Size Calculator does the math, glass included.
Here is why glass matters. A 6 by 6 room with a 7-foot ceiling is 252 cubic feet, and the calculator puts a 6 kW heater at the right size. Add an all-glass door and the same room needs 7.5 to 8 kW. Choose the heater after you choose the door.
Mount the heater with the clearances printed in its manual, fit a guard rail around it (the Hotass packages include a heater guard), and load the stones the manual specifies. Never use garden rocks.
Step 10: Hang the door and the lights
Sauna doors open outward and have no lock, only a magnetic or roller catch, so nobody can be trapped inside. Any glass in the door must be tempered, which the residential building code requires for glass in doors. Our glass sauna doors start at $759.05.
Use light fixtures and strips rated for sauna heat and moisture, and keep them away from the heater.
Step 11: Finish the wood
Treat the benches with paraffin oil and leave the walls bare or use a sauna wax. Never use ordinary varnish, lacquer or paint inside a sauna: HUUM warns that they trap moisture in the wood.
What a 6 by 6 DIY sauna costs in parts
Here is a real parts list for a 6 by 6-foot indoor room with a 7-foot ceiling and an all-glass door, using today's store prices:
| Hotass Saunas HAS Sauna Wood Package 6x6 (cedar wall and ceiling boards, vapor barrier roll, two-tier benches, backrest, duckboard floor, heater guard, trim, hardware) | $8,600 |
| Harvia KIP80B Pkg, 8 kW heater with built-in controls | $1,317 |
| PROSAUNAS Clear Glass Sauna Door 24x81, Aspen | $798.15 |
| PROSAUNAS Universal Sauna Light Kit, 16-ft LED strip | $298.35 |
| PROSAUNAS Aspen Air Vent, 2 at $73.10 | $146.20 |
| PROSAUNAS Aluminum Tape, 50 mm x 50 m | $32.86 |
| Sauna materials | $11,192.56 |
Not included: framing lumber, insulation, the electrician, and delivery, which shows at checkout. Our home sauna cost guide covers typical electrician prices.
Want to build it on screen first? The Sauna Builder lets you pick the room size, benches, door, heater, lights and vents, checks that the parts work together, and adds the whole list to your cart.
Sources
- Plunge Into Saunas catalog prices and product contents (Hotass, PROSAUNAS, Harvia), checked October 5, 2026.
- Harvia, Ventilation in the sauna
- Harvia, How do I select the correct heater power?
- Harvia, Choosing sauna benches
- HUUM, Sauna building envelope structures
- International Code Council, 2021 International Residential Code, Chapter 3 (R308.4.1 glazing in doors, R316.4 foam plastic thermal barrier)
- Plunge Into Saunas, Sauna Build Guides, with 21 linked manufacturer manuals and code documents


